Views: 1092
Welcome to Lumen Pro
Lumen Pro is a powerful Blender add-on designed for 3D artists, architects, and lighting designers to
streamline workflows with .ies and .ldt photometric data files.
Integrated with Blender’s Cycles, Lumen Pro delivers precise lighting control, real-time visualization,
and advanced analysis tools to elevate your renders.
- Getting Started (#getting-started)
- Installation and Activation (#installation-and-activation)
- Core Features (#core-features)
- Lumen Graphs (#lumen-graphs)
- Upcoming Features (#upcoming-features)
- Troubleshooting (#troubleshooting)
- Support and Resources (#support-and-resources)
1. Gettings Started:
Lumen Pro is available via a subscription model (monthly or yearly) for continuous updates and support.
- System Requirements:
- Blender 4.2 or later.
- Windows, macOS, or Linux.
- Internet connection for license activation.
- Subscription Plans:
- Monthly: Access all features with flexible billing.
- Yearly: Save with an annual subscription.
- Subscribe Now (#)
- Why Subscribe?
- Regular updates with new features and performance improvements.
- Priority support via email or discord server
- Seamless license management through our integrated license server.
2. Installing Lumen Pro:
Lumen Pro is a full Blender Extension that means installing and update from q3de server.
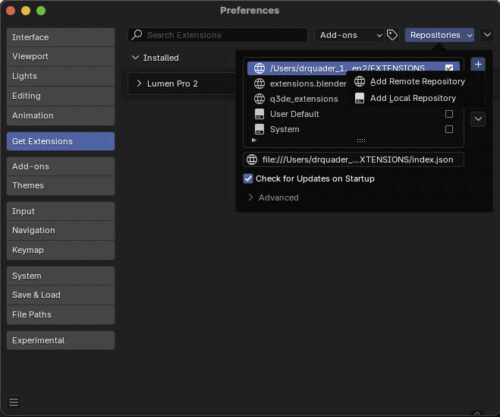
Go to Blender Preferences and open the Get Extensions tab. Click on Repositories and then the + sign.
Choose Add Remote Repository.
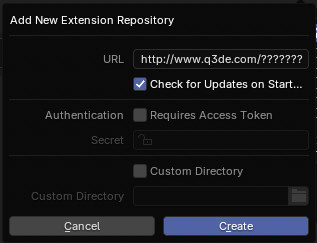
Enter the url you were given at your purchase. Check Check for Updates on Startup.
Press Create.
Lumen Pro can now be found under the Available Extensions.
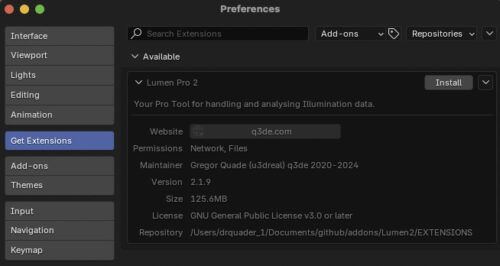
Ready to install Lumen. Press Install. Wait until install is finished.
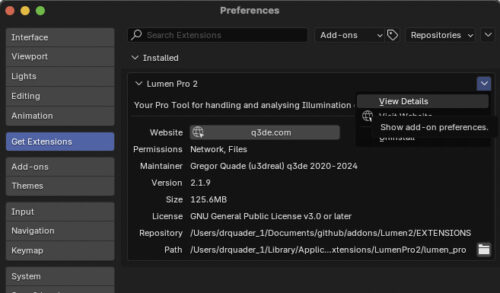
Press the little arrow on the right and select View Details.
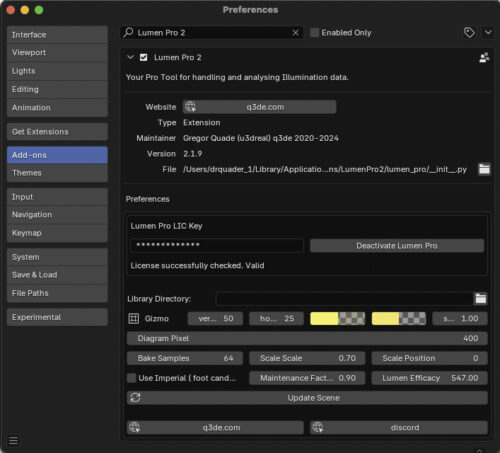
That brings you to the addon preferences.
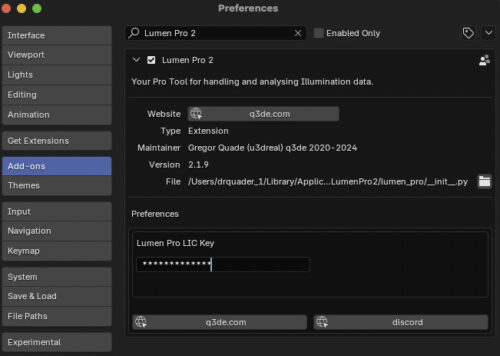
Enter your license key you got with your puchase.
Lumen will check and activate your license to the used hardware.
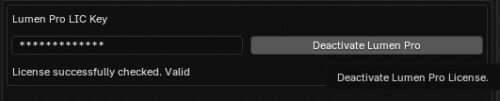
If you want to use this license on another hardware make sure to deactivate it first before uninstalling.
You will have to enter your license with every update so make sure you copy it first.
Running Lumen on different operating systems on the same hardware works.
Congratulations ! You have successfully installed LumenPro.
3. Core Features
Lumen Pro simplifies photometric lighting workflows with intuitive tools:
-
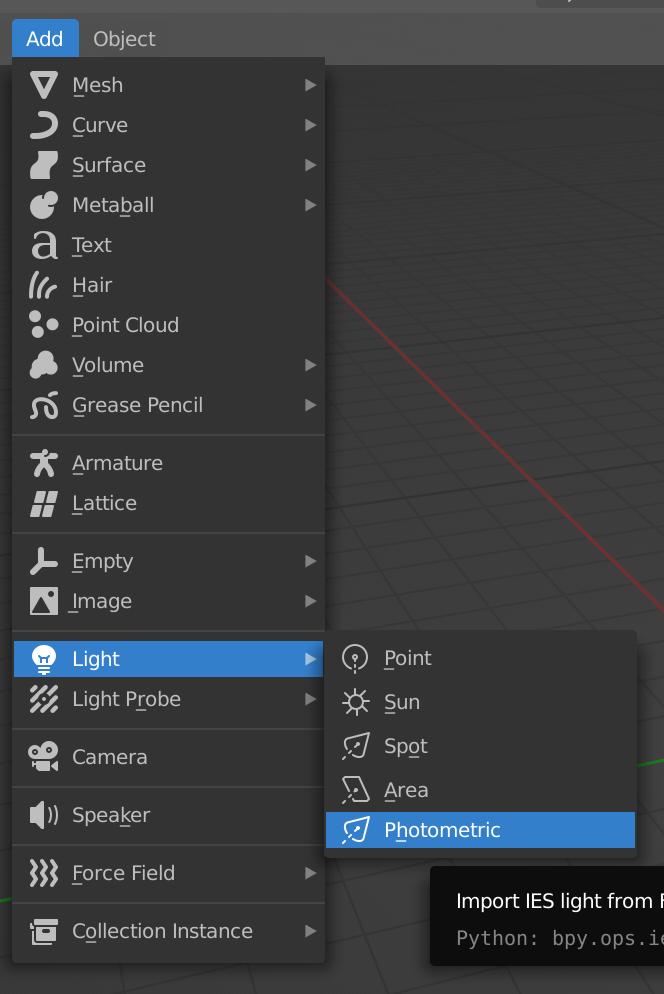
Import Photometric Files: Add .ies or .ldt files via Add Menu or Shift-A in Blender’s 3D viewport.
-
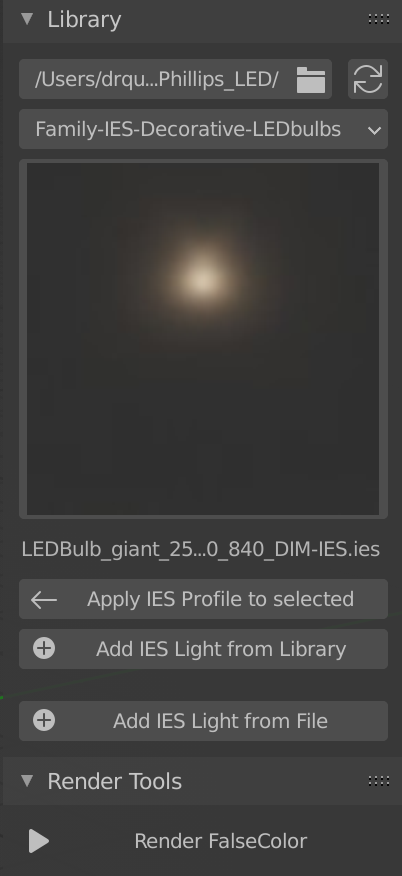
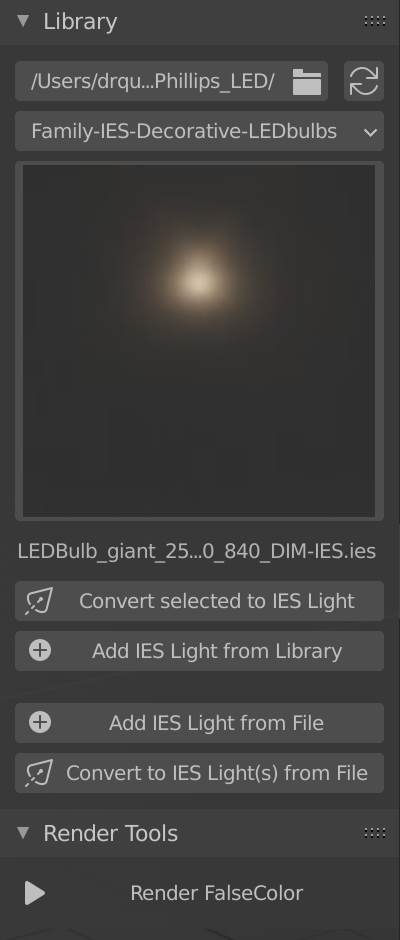
Dynamic Library: Manage files in the N-panel (3D viewport). Add, replace, or convert lights effortlessly.
-
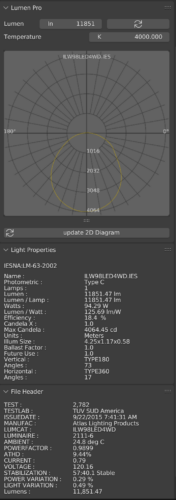
Light Panel: Access light material nodes, view 2D radial diagrams, and inspect file details.
-
Light Settings:
-
Set blackbody temperature for realistic lighting.
-
Adjust intensity in lumens for precise control.
-
-
Real-Time Visualization: Enable Lumen ISO view under RT to visualize lighting in lux or foot-candela.
-
Wire Representations: Display 2D radial diagrams or wireframes in the 3D viewport for quick insights.
-
Batch Operations: Apply or replace photometric data across multiple lights simultaneously.
Usage:
Simply add .ies or .ldt files from the Add menu or by pressing Shift-A.
LumenPro Light Panel:
Navigate the intuitive Light panel to access light material nodes, 2D diagrams, and detailed file contents.
Library:
Utilize the dynamic Library in the N panel of the 3D viewport to organize files and perform actions like adding, replacing, and converting lights.
The Library also includes subfolders to browse to.

Light Arrays:
You can use Blender instancing on mesh verticies to array lights.
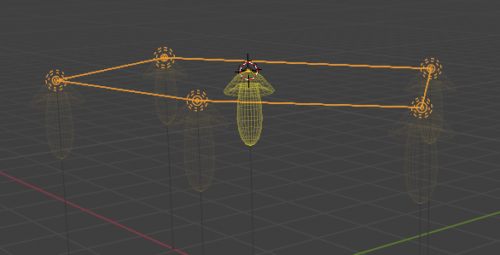
Make sure the light and the mesh share the same origin ! Apply scale to mesh.
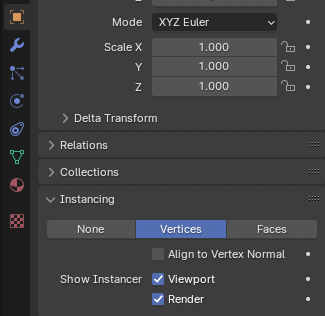
Select the Light. Shift-select the mesh. Ctrl-P to parent. Then enable object->Instancing->Verticies on the mesh.
If you have any offset apply Scale Ctrl-a -> Scale. Use edit mode to change mesh geometry if needed.
Instances are draw in their own color which can be changed in preferences.
The instanced Light will be visible but will not contribute to rendering / calculations.
Select it to change properties on instances.
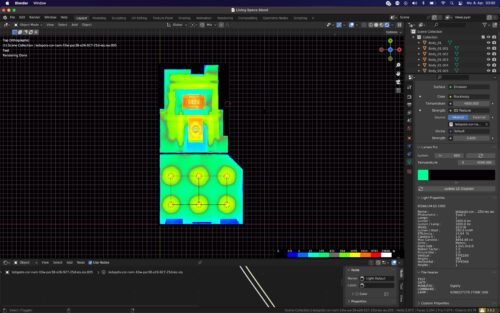
False color Rendering Preview:
Experience enhanced visualization with a dedicated button for quick rendering in false color view under Render Tools.
Easyly get an overview with the scale in lux or foot candela.
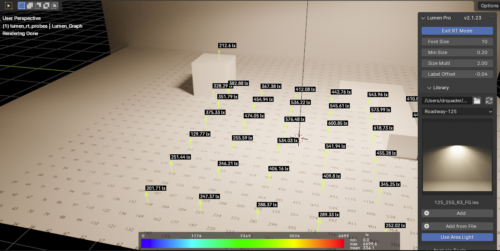
Lumen Graphs:
Create Lumen Graphs to gain detailed insight into the lighting.
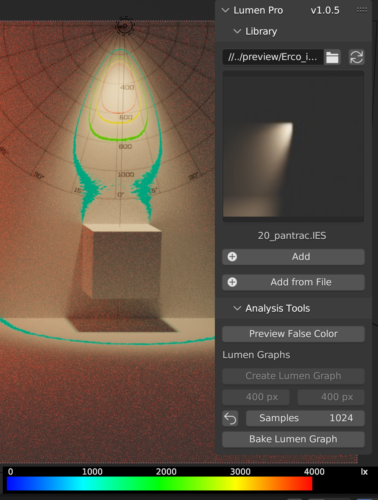
Graph Types:
texture
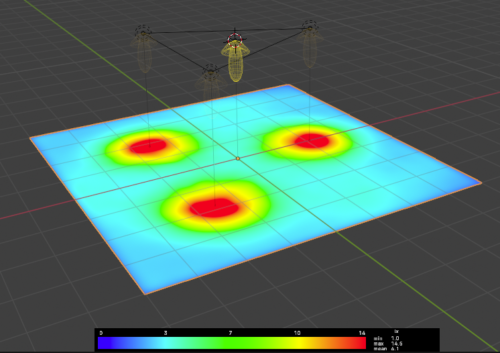
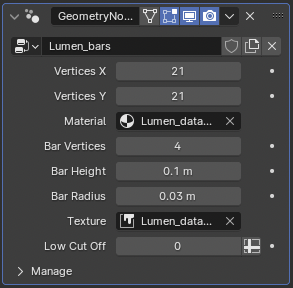
bars
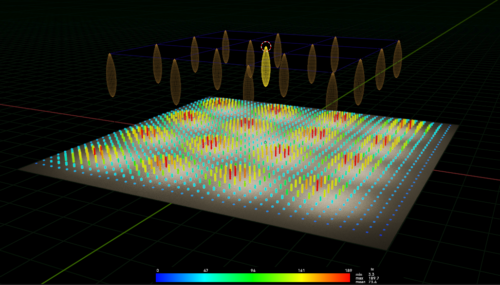
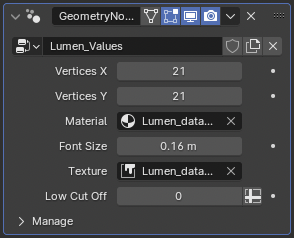
Settings in Geometry Node Modifier
values
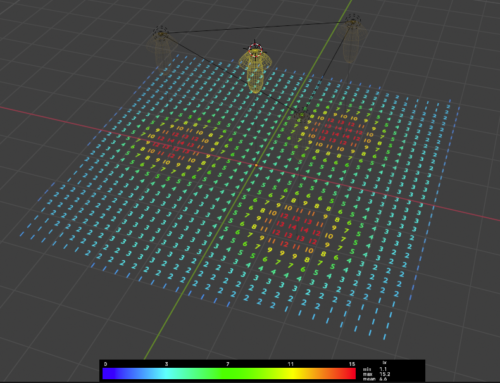
Settings in Geometry Node Modifier
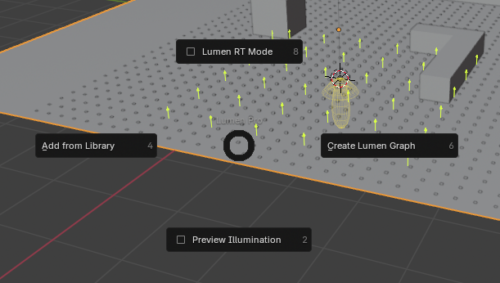
Lumen RT:
Enter Lumen RT Mode to enable real-time measurements from the render buffer.
Press Ctrl + Alt + Left Click to place a probe at the 3D cursor.
Duplicate the probe by pressing Shift + D to create additional probes.
Use the Grab and Translate tools, holding Ctrl to snap to the nearest surface point.
Adjust display settings in the RT Panel.
Pie Menu:
Initial pie menu for testing and faster access to commands.
Preference panel:
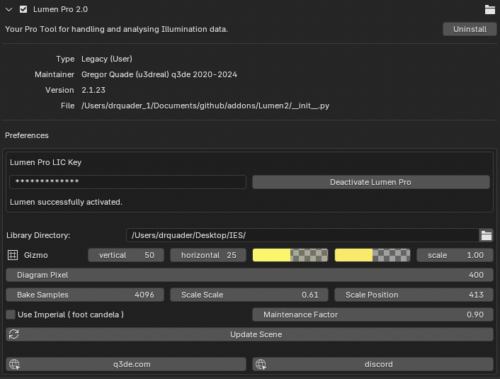
Customize your preferences effortlessly through the Preference panel, accessible via system settings.
Set default library folders, resolutions, and more to tailor Lumen Pro to your specific needs.
Scale and Place the Scale howevery you want.